
Creating a Windows 10 Creators Update 1703 XenDesktop VDI managed by Ivanti/RES ONE Workspace
 Recently I have created a Windows 10 Creators update (1703) non presistend XenDesktop VDI system. Windows 10 CU 1703 has a few complications when it’s used as a VDI OS, especially with the start menu and profile. I will try to tackle them all in this blog. First we need the following things:
- BIS-F Sealing Script by Login Consultants
- VMware OS Optimization tool
- Profile Update Utility by Virtual Engine
- Administrative Template ADMX for 1703 by Microsoft
- Windows 10 Notifications ADMX by Jeffrey Harness
- Delete Local Profile Script on the RES HUB
- Windows 10 1703 Enterprise Edition the PRO edition will not take all GPO’s.
- Of course Citrix XenDesktop and PVS 7.15 and Ivanti / RES ONE Workspace v10.1.100.0
Creating the Golden Image for Citrix PVS
 I am a fan of automating all that is possible, so I think creating the Golden Image for Citrix PVS should be done mostly automated with RES ONE Automation. One of the more difficult things to automate is the imaging process itself. The command lines for P2V.exe are not really clear. But the BIS-F sealing script helps you by sealing and imaging the disk. But it does so much more than that. It also cleans your disk, removes unique GUIDS and does tons of optimizations. One of the optimizations I love is the ability to automatically move your RES ONE Workspace and Automation cache to your persistent disk. Read about the effect of moving the cache on the success center here. A few tips to think about when creating your Windows 10 1703 Golden Image:
- Automate as much as you can; application installations, driver update, printer updates, etc..
- Automate the sealing of the image and imaging of the disk with BIS-F sealing script.
- Try not to do much optimization other than the BIS-F optimizations before creating the image, because some optimizations can break Windows and it is easier to revert to a previous version of your disk than recreating the disk.
Hybrid Local Profile Windows 10
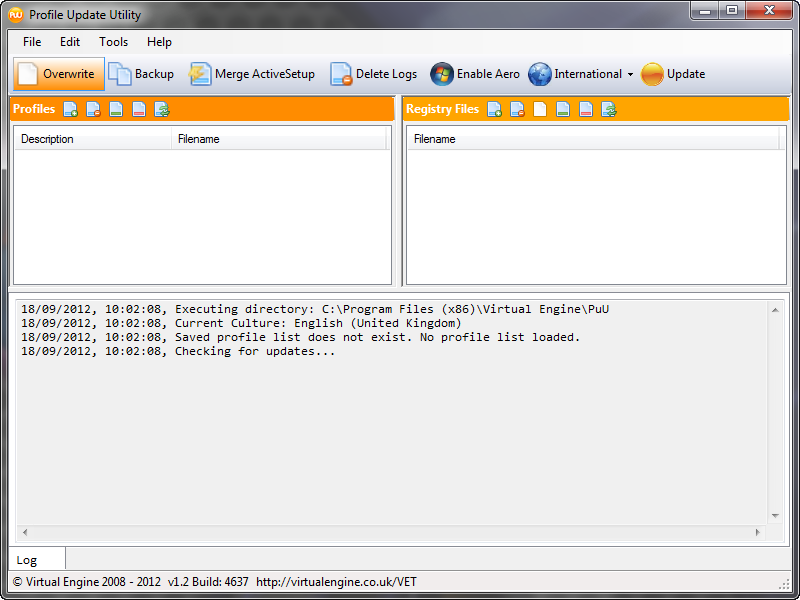
Ivanti / RES ONE Workspace has a great feature called Zero Profile which captures and restores settings on application level, saving a lot of time when signing into your session. Read all about it in my RES Cheat Sheet 2017 . Because Zero Profiling is a hybrid profile solution it needs a base profile. In the past and with XenApp deployments I have always used Mandatory profiles as the base of Zero Profiling. But since creating a mandatory profile for Windows 10 has become a real hassle, it is easier to use a so called Guest Profile. This is just a local profile but it gets deleted as soon as the user logs off. But this does mean that every time the user signs in the default profile will be copied to a local profile. So it’s important to modify the default profile with all your customizations and make it as fast as possible. To do this you can use the Profile Update Utility from Virtual Engine. With this tool you browse to the NTUSER.DAT from the default profile and add REG file to it and you can even merge your HKCU with the default profile.
One of the issues with the hybrid local profile is that the profile will not be deleted when the user signs out. Because we use a Citrix VDI it will reboot the VDI when the user is done, and because of PVS the profile will be deleted. But this is not a fool proof system. A better way is to change the profile SID to a Guest profile when signing out. Guest profiles will always be deleted at sign out. Changing of the profile SID can be done with a script. You can download the script as an Execute Command Task in RES ONE Workspace here from the RES HUB.
Windows 10 sign in speed
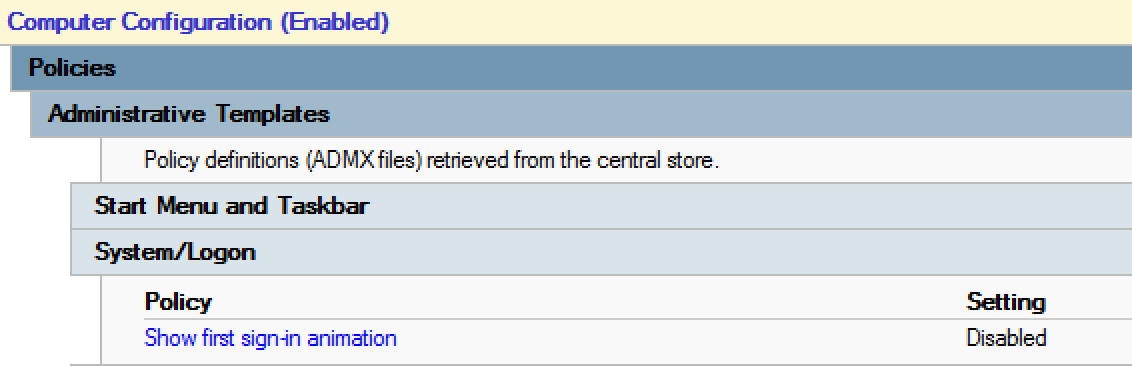
Even after changing and optimizing the default profile, sign in speed will still be slow in Windows 10. We need to do two thing to change this. First we need to disable the Hi, Welcome screens so it won’t be shown. You can do this with a DWORD named EnableFirstLogonAnimation in HKEY_LOCAL_MACHINE\SOFTWARE\Microsoft\Windows\CurrentVersion\Policies\System and give it the value 0.
![]()
Or you can set this with a GPO object:
This will improve the sign in speed but not drastically. To do that we need to optimize Windows 10 with the VMware OS optimization tool. The VMware OS optimization tool scans/analyse your system and compares it to pre made templates. After that you can optimize your system by clicking on optimize. This will set the setting from the template. The template I used is the Windows 10 – Login VSI – VDI Like a PRO.
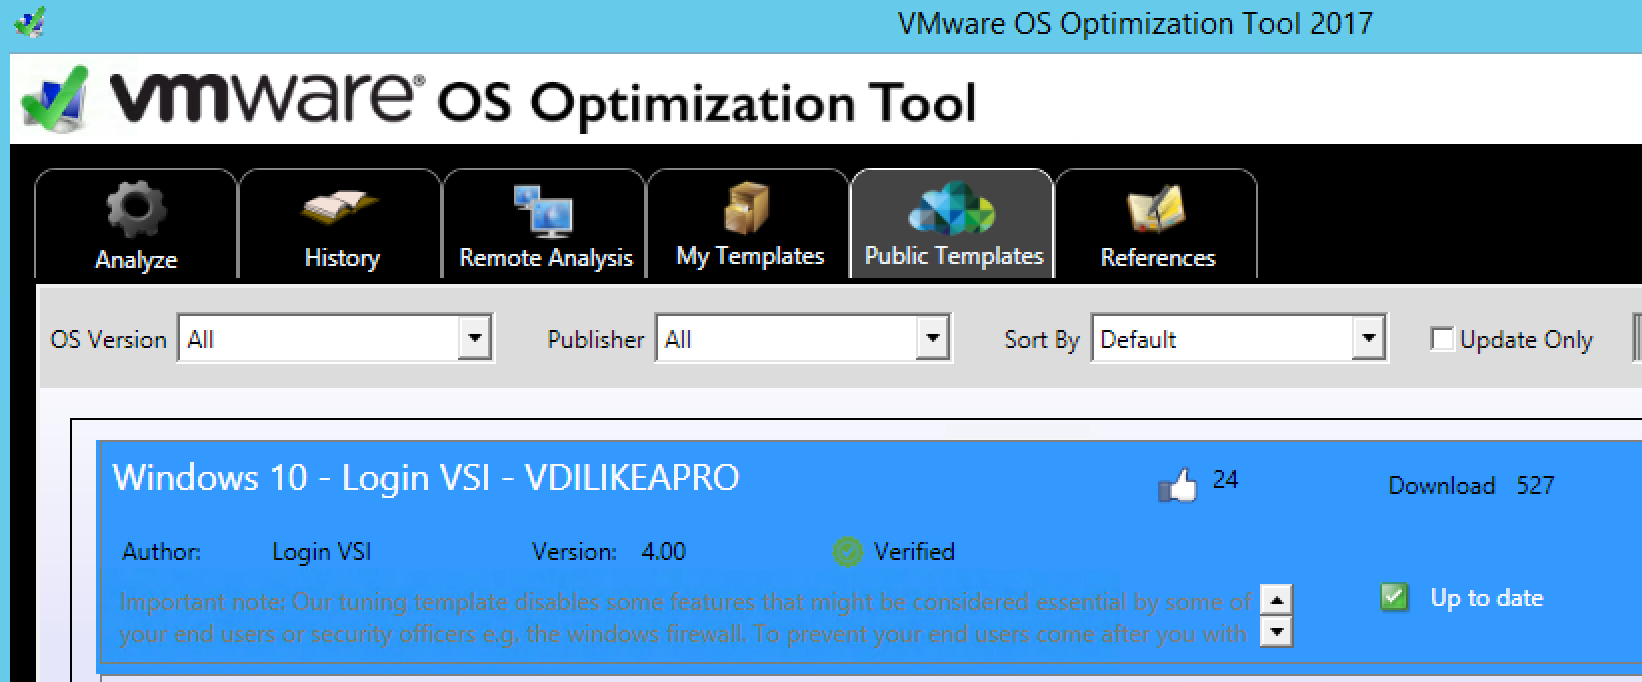
You can find this great template under Public Templates.
The end result:
Mind you that this is on a Xeon from 2010, on 10K HDD with modern hardware this will be faster.
Start menu, Start Tiles and Built-In Modern Apps
There are a few issues with the start menu we need to address:
Custom Tiles Layout
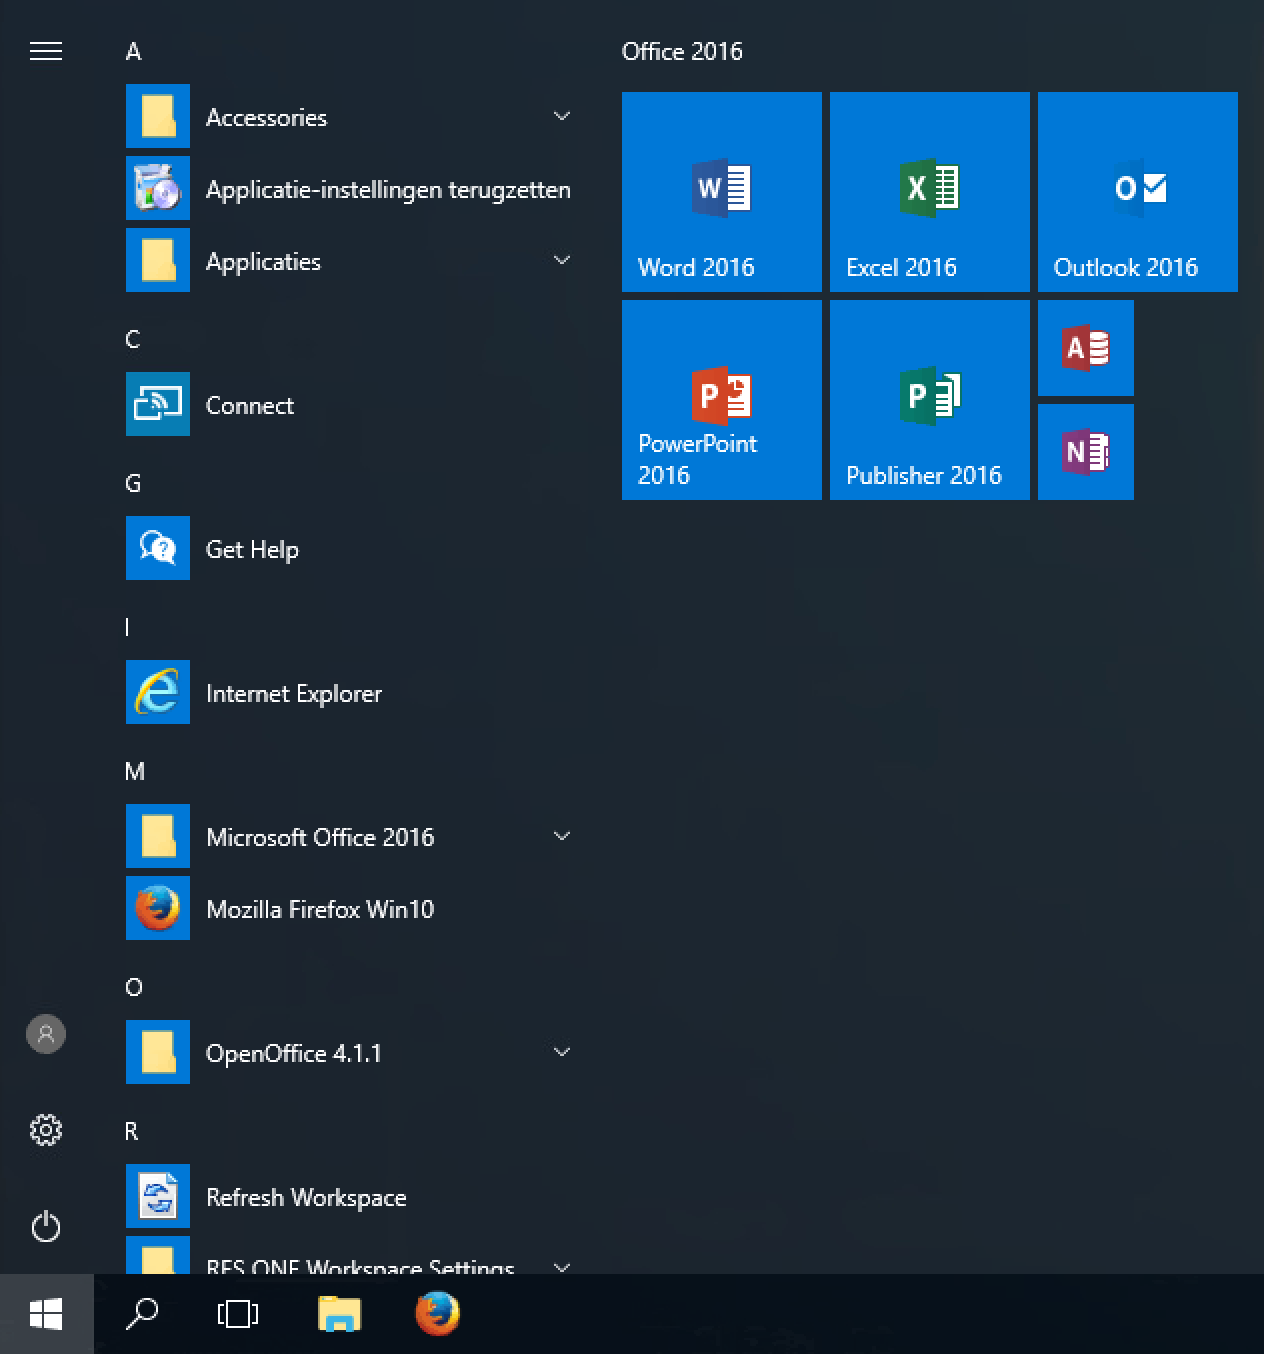
We need to set a custom start tiles layout because the default profile I used would just set a link to settings and Edge in the tiles. But I want all my users to have Office 2016 linked in the tiles. To do this we need to set a GPO named Start Layout. In this we can specify a XML file with a default layout.
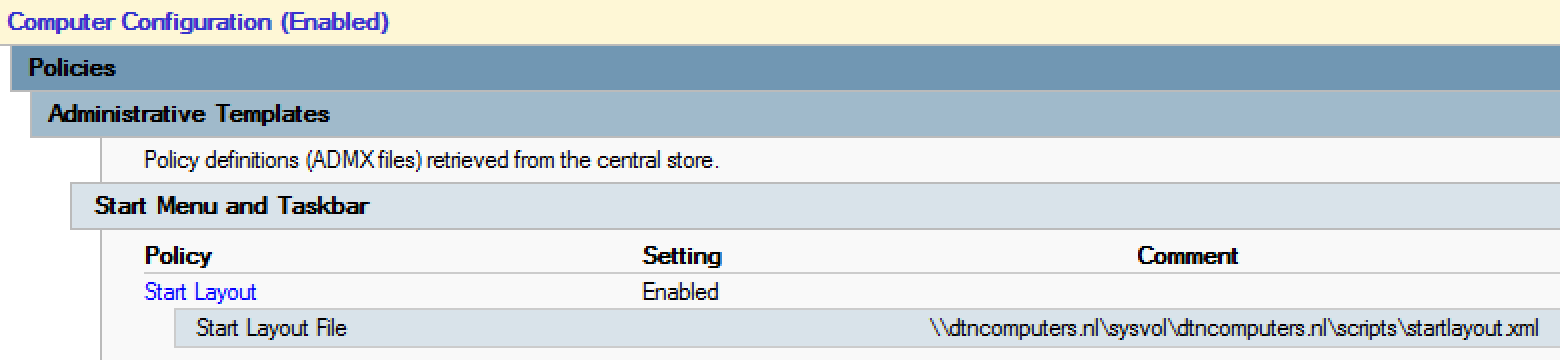
The setting I set in the XML :
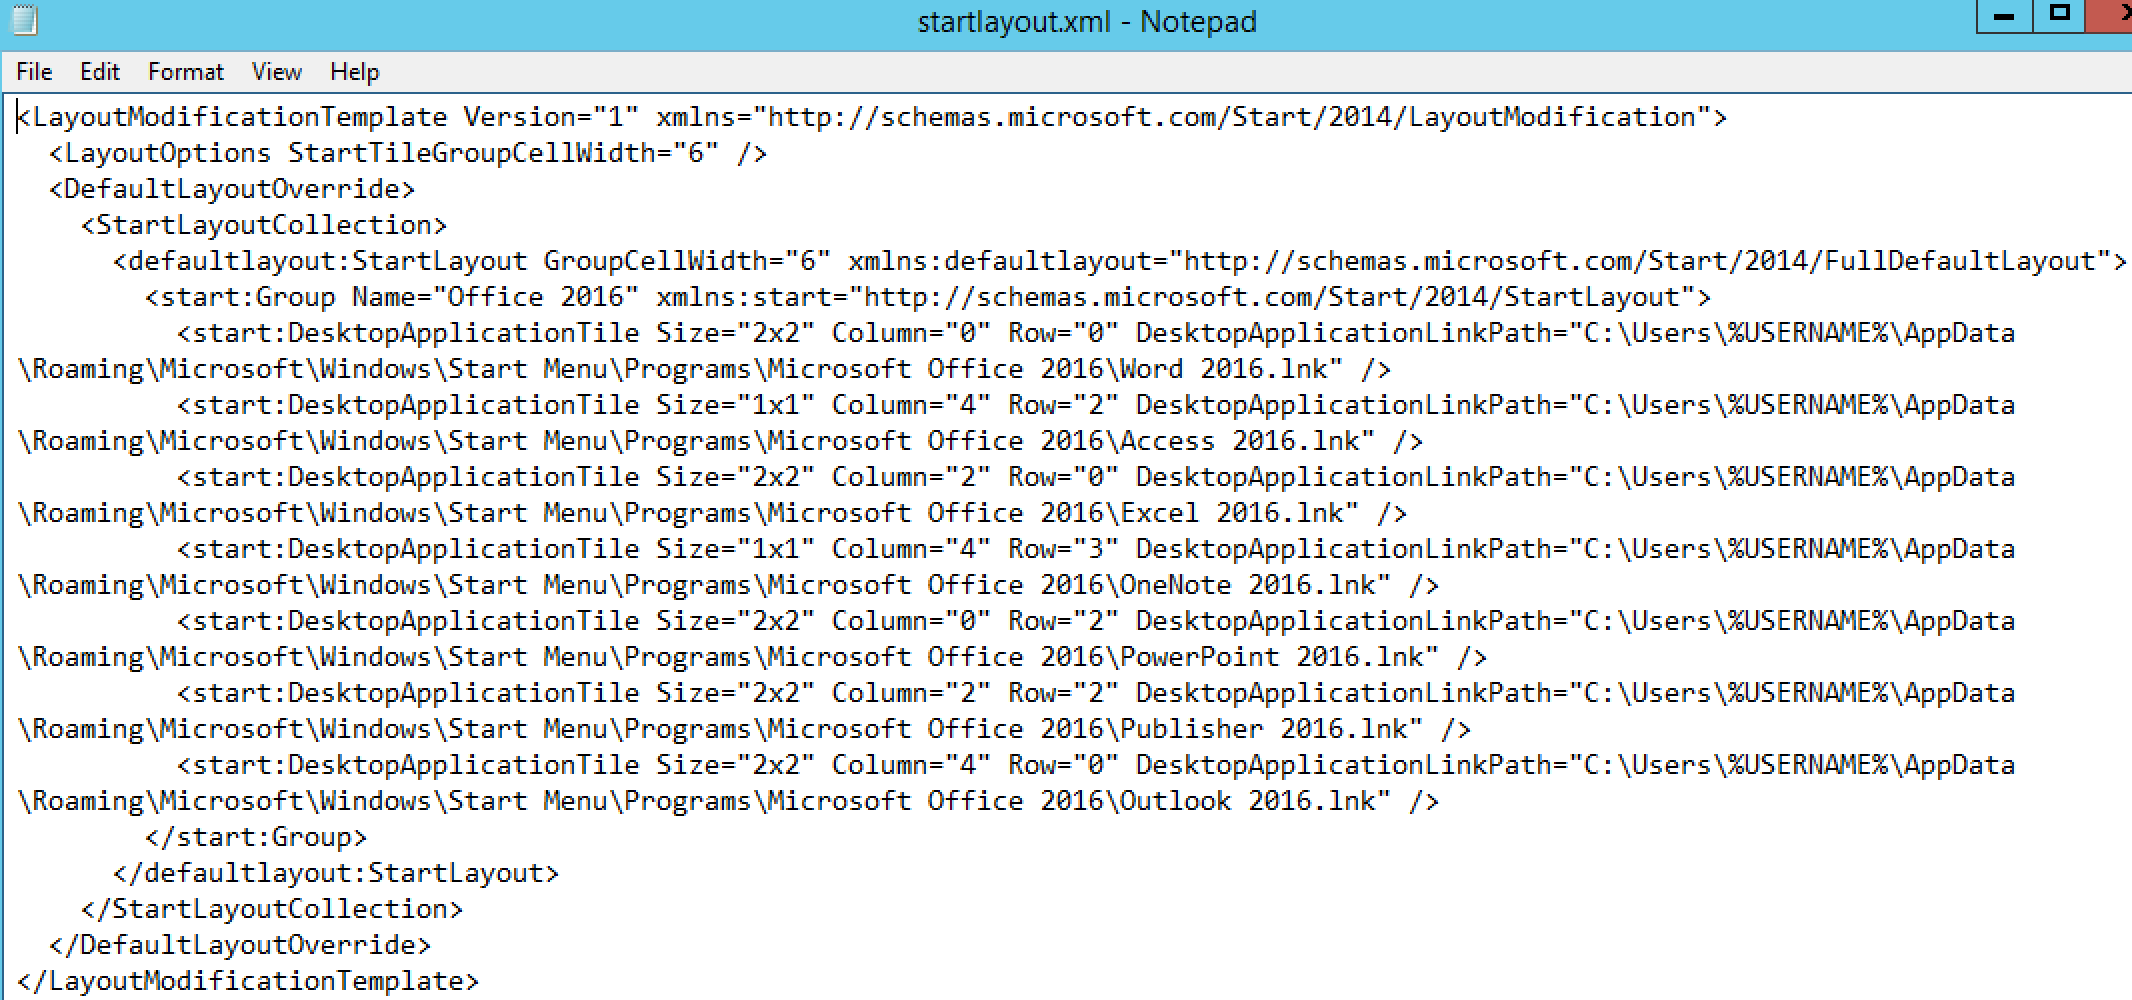
There are a couple of ways to create the XML, but the easiest thing to do is to just sign in, create the tiles you want and then export the setting with the PowerShell command: Export-StartLayout -Path “C:\Temp\StartLayout.XML” After creating the file you can copy it to a network share or the SYSVOL and link the GPO to it.
Fix website shortcuts
There is another issue I encountered with the start menu. Most of us who use RES ONE Workspace know that it is handy to add shortcuts to websites in the start menu to make it easier for users. But Windows 10 will not show your websites except for one. This issue is known by RES and they made a fix, you can find it here one the success center. The fix is quite easy. You just need to create an EnableMultipleIE string in the Workspace Manger key with the value Yes. But this doesn’t fix the whole problem because I also have shortcuts to website which launch in firefox. These are also not shown. You can fix this with a customAppUserModelIDs.xml . Read about it here on the success center. It is also a really easy fix, you just add all the application ID’s of your firefox shortcut to the XML and you’re done.
Built-in Modern Apps
Windows 10 1703 comes with a lot of built in Apps like photo’s, Camera, Xbox etc.. In a business environment it is not desirable to have these applications in the Start Menu and even if you have selected replace all unmanaged shortcuts in RES ONE Workspace, these shortcuts stay. So we need to delete them. To do this we need to do two things. First we need to uninstall the apps, you do this with the following PowerShell command: Get-AppxProvisionedPackage -Online | Remove-AppxProvisionedPackage -Online This will uninstall the built-in modern apps. Now we need to make sure they are not installed back again if a new user signs in. We do this with the following GPO :
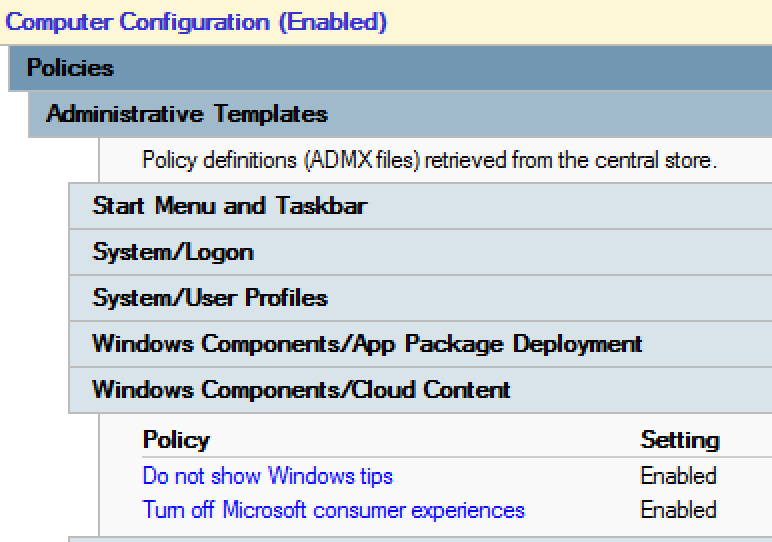
By setting the Turn Off Microsoft Consumer experience we will not get the Apps back.
Optionally Remove Microsoft Edge
The start menu will still have some Apps, these are Connect, Get-Help and Edge. If you want to remove Edge you can do this easily by renaming the following folder: C:\Windows\SystemApps\Microsoft.MicrosoftEdge_8wekyb3d8bbwe. By renaming this folder to .OLD, Edge can no longer be used and will not create a shortcut in the start menu.
The result:
Some small issues: Icon Cache and Windows Notifications
Because the BIS-F script moves the cache of RES ONE Workspace to a persistent disk, we encounter a small bug with version v10.1 that icons won’t work and stay blank. This bug is solved by RES with the small update of v10.1.100.0. By installing this update and emptying your cache folder the icons appear again. You can read more about this here on the success center.
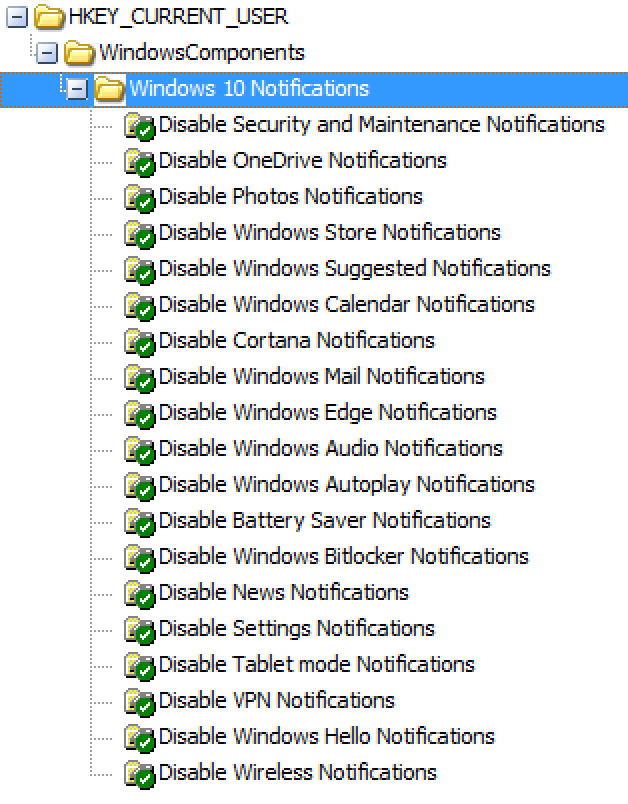
Another small issue I had was with windows notifications. These keep popping up because of all the optimizations and because RES ONE Workspace changes the default file association of some files. You also get a lot of notifications about the browser changing. RES has written about this on the success center here. But they don’t offer a solution because this is by Design. But I found on a Technet blog that Jeffrey Harness had created a custom GPO for Windows 10 notifications, you can download it here. After downloading the ADMX file you can import it into RES and turn off Windows 10 notifications.
GPO’s
As you can read in this blog GPO’s are really important in making Windows 10 1703 work as a VDI. I would recommend downloading the latest GPO from microsoft here. You can then add them to your PolicyStore or import them into RES ONE Workspace.
I hope this was informative. For questions or comments you can always give a reaction in the comment section or contact me:
