
Create a Virtual Machine in Microsoft Azure through self-service with Ivanti / RES ONE Identity Director
 In this blog I will explain how to setup Ivanti / RES ONE Identity Director to connect to Microsoft Azure. This combo makes it possible for end users to request a new Virtual Machine as a Service, which can be handy and save a lot of time for the system administrator. For example, when a company acquires a new application often it requires new application servers. Most of the time the application manager will give the system administrator the required specifications and then he makes the Virtual Machine and grants access to the application manager. It can be much easier to let the application manager fill in the specifications in a Ivanti / RES ONE Identity Director service. Then authorize the service and let it automatically create the VM and send the credentials and rdp link to the application manager.
Setup Ivanti/RES ONE Automation Azure connector
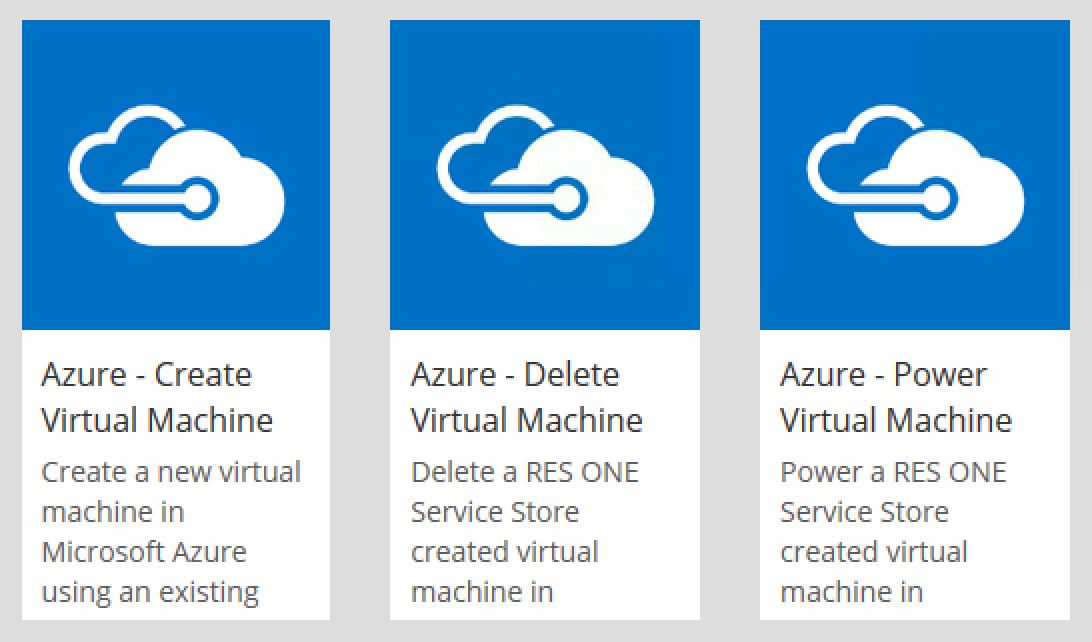
You can download the RES ONE Automation connector for Azure from the RES Success Center. After installing the connector you will have the following extra tasks available:
 |
Before you can use these tasks you need to fill in the global variables which will also be added:
 |
I will explain where you can find the values you need to add to these variables.
Azure Client id
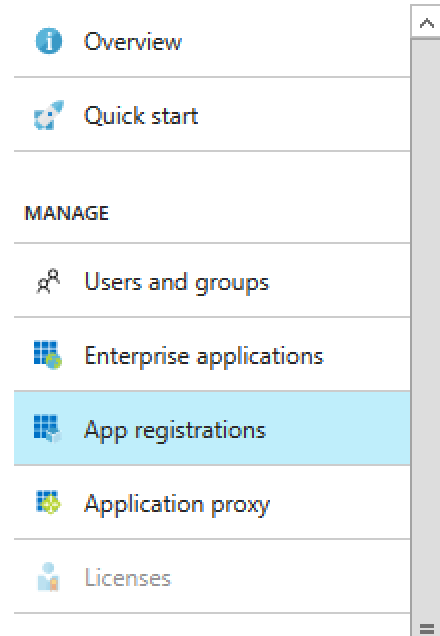
To connect Ivanti/RES ONE Automation and thereby Ivanti/RES ONE Identity Director to Microsoft Azure, you need to setup an Azure Active Directory application. Go to Azure Active Directory.
 |
Click on App Registration.
 |
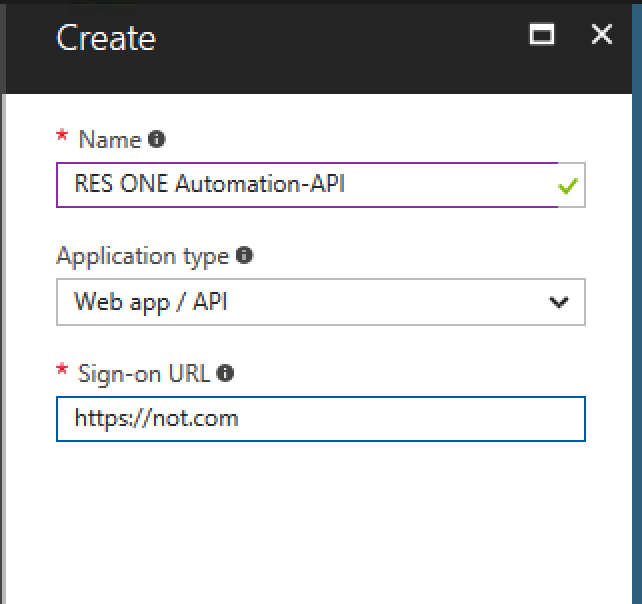
Click on New Application registration.
 |
Fill in a Name like RES ONE Automation-API.
Select Web app / API
There is no sign-on URL so you can just fill in https://not.com
 |
After you saved the application you will see it in the overview.
Click on the application name.
 |
Here you will find the Application ID.
 |
Copy the ID and paste it in the Ivanti/RES ONE Automation Azure Client ID Variable.
Azure Client secret
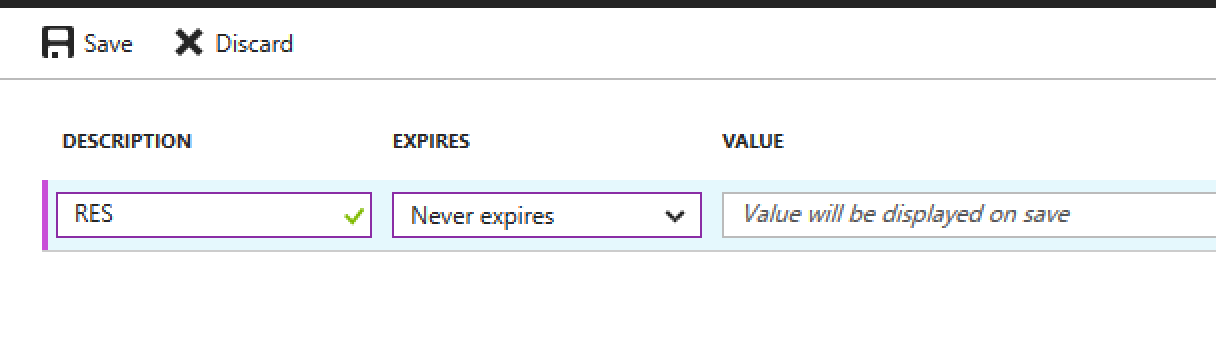
Now we need to create a API key. This will be the Azure Client Secret in Ivanti/RES ONE Automation. In the application where you found the Application ID, you have a menu option called Keys. Click on Keys.
 |
Add a description, choose Never Expires and click save.
 |
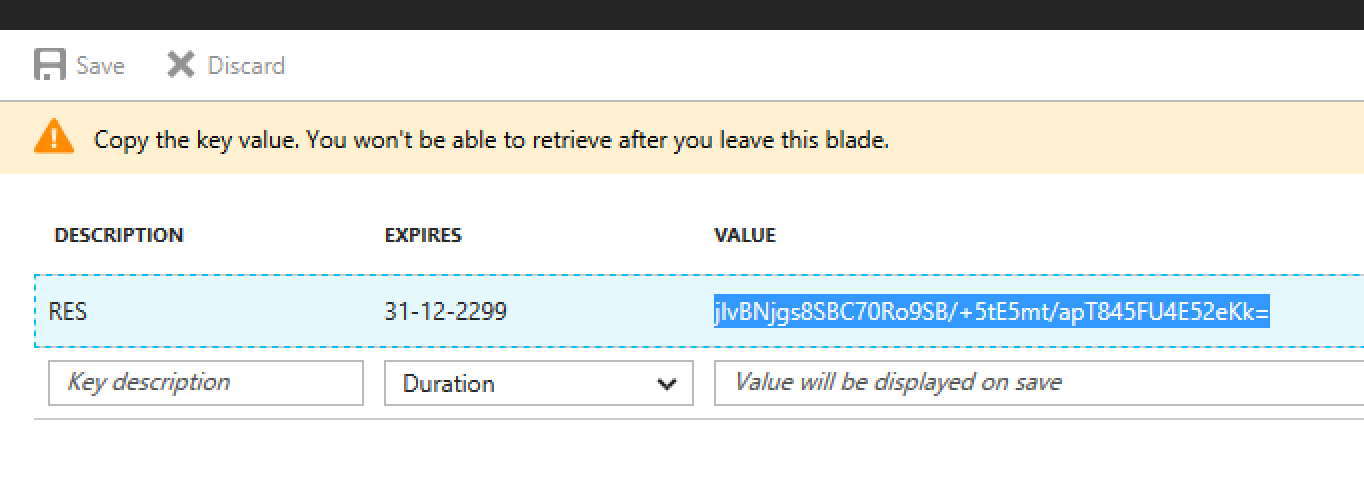
After you saved the key it will be generated. you can now copy this Key and paste it in Ivanti/RES ONE Automation Azure Client secret Variable.
 |
Azure Namespace
The Azure Namespace is the domain name you use for Azure AD. Go back to the Azure Active Directory.
|
Click on Domain Names the menu.
 |
Find your primary domain name or your onmicrosoft.com domain name, for example Workspace-Guru.onmicrosoft.com.
Enter this in Ivanti/RES ONE Automation Azure Namespace Variable.
Azure Subscription id
The last variable we need to fill in is the Subscription id. Search for subscriptions in Azure.
 |
Here you will find your subscription id. Copy it and paste it in Ivanti/RES ONE Automation Azure subscription id Variable.
 |
That’s the last Variable. Now you’re almost set to start using the Azure connector. The last thing we need to do is grant the Application access to your subscription.
Grant Access to the Azure AD application to your Subscription
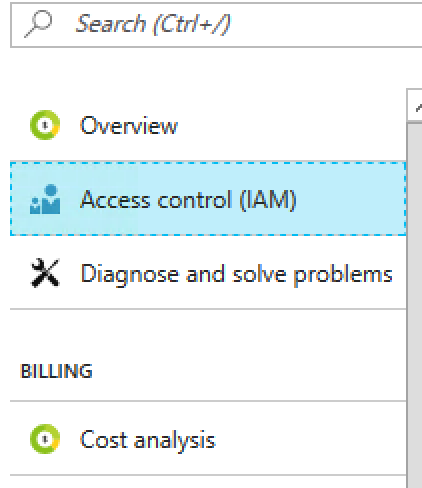
Click on your subscription in the subscriptions screen. Click on Access control (IAM) in the menu.
 |
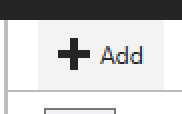
Click on Add.
 |
Select the Owner role, search for the Application and select the Application.
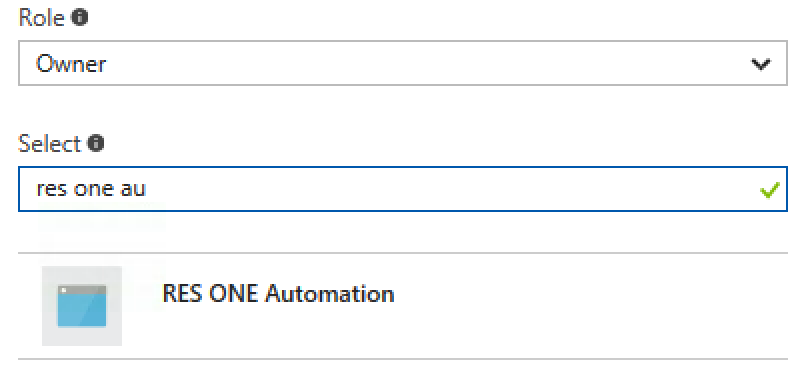 |
After you saved the new permission you’re finished and ready to use the new Automation Tasks.
Azure VM Management Sample Building Blocks
Ivanti/RES has created Azure sample building blocks which you can download from the RES HUB here. This package includes Automation and Identity Director building blocks. Import these building block into their respective programs and you’re ready to start using self service for Azure VM’s.
 |
You do need to set the “RunbookWho” attribute in Identity Director and I would make the VM name, admin and password attribute mandatory, but other than that these are some great starting points! The Create Virtual Machine services first queries Azure for all available OS and VM flavors because these are subject to change. The requester is presented with great pull down menu’s for selecting the OS and VM size.
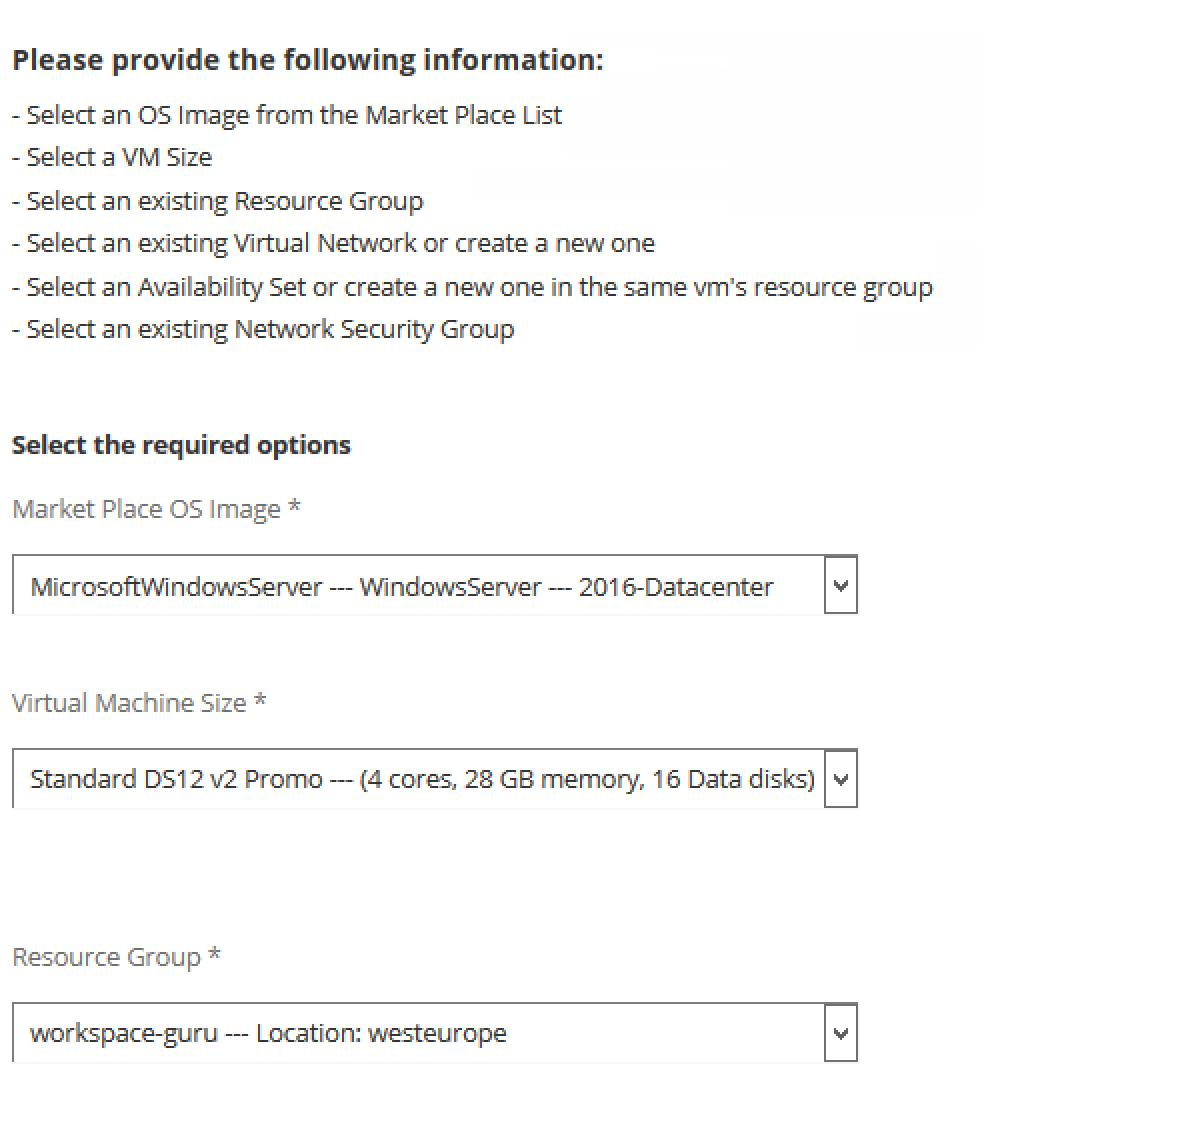 |
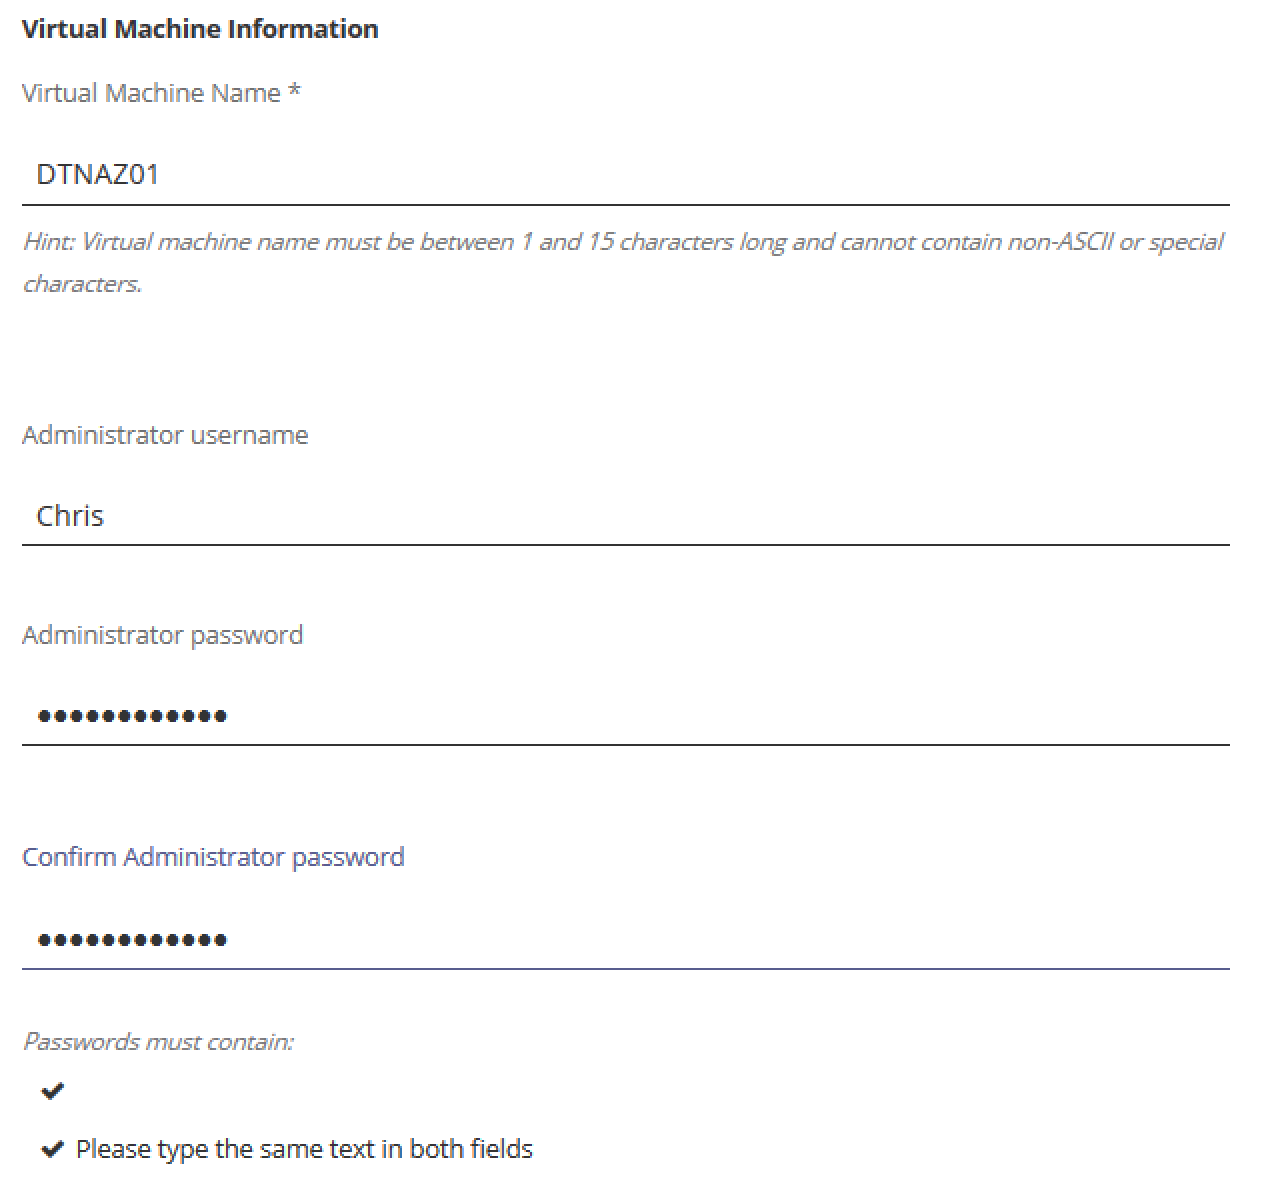
After that the requester will be asked to provide a VM name , login name and password.
 |
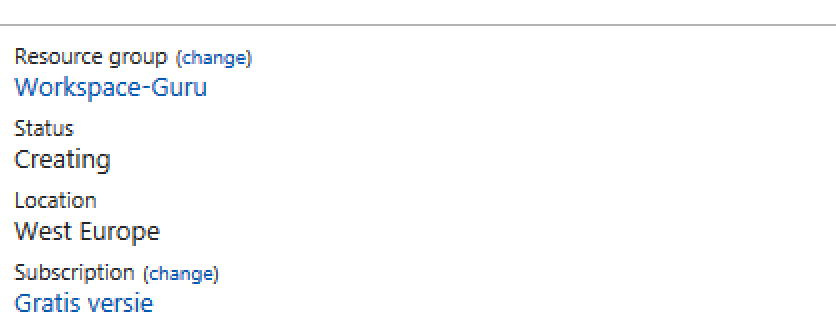
After filling in these fields the VM will be created. If you wish you can of course add a approval process to this workflow.
 |
When the VM is done, Identity Director will send a message with all the necessary info, including a link to the RDP connection.
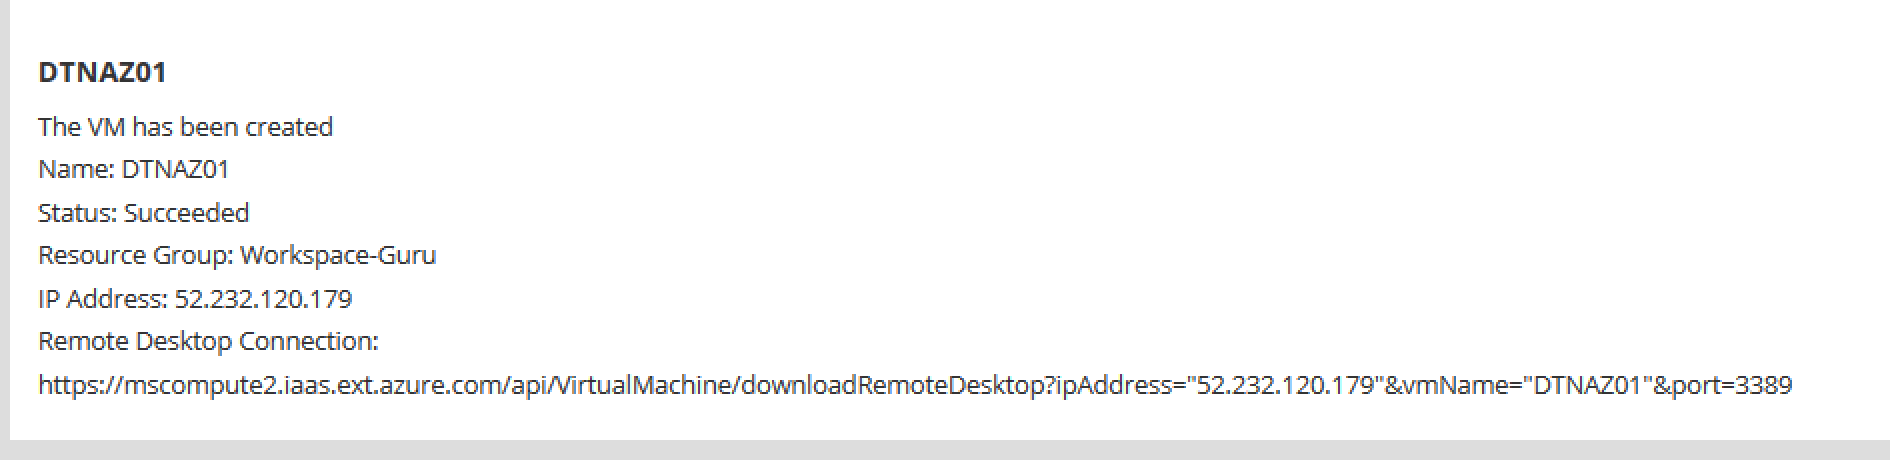 |
The requester can now connect to the VM and start the application installation.
 |
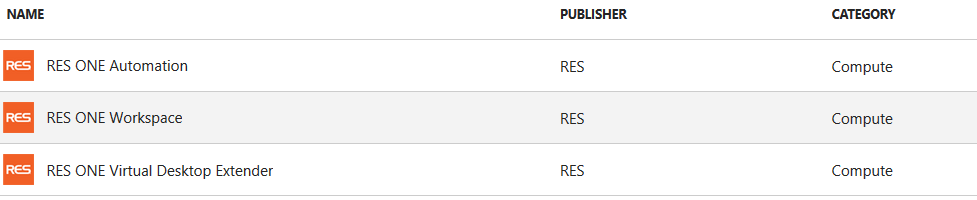
![]() It is also possible to deploy your Ivanti / RES ONE Automation environment in Microsoft Azure. Ivanti /RES has created click and run templates in the Microsoft Azure Marketplace for Automation, Workspace and VDX. I will spend some more time on this in a next blog.
It is also possible to deploy your Ivanti / RES ONE Automation environment in Microsoft Azure. Ivanti /RES has created click and run templates in the Microsoft Azure Marketplace for Automation, Workspace and VDX. I will spend some more time on this in a next blog.
 |
I hope this was informative. For questions or comments you can always give a reaction in the comment section or contact me:
